At the end of PART 2 of this article, we had completed the work on the chip repairs and now we will continue with the preparation of the Module Board for the refitting of the chips.
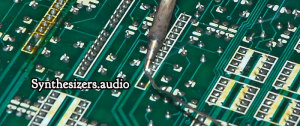
First up, we need to remove the remains of the old chip pins. Turn the Module Board over to the solder side and apply a small amount of fresh solder to each of the pin remains. This will more easily facilitate the following steps.
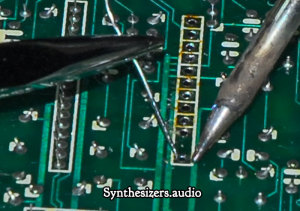
Remove the remains of each pin by heating each one and pushing the pin out with a wire offcut. An offcut from a power diode is ideal. It is thick enough to be solid while still fitting in the PCB hole. Alternatively, you can use a paperclip or a dressmaking pin. Make sure you pull the offcut (or pin/paperclip) out of the hole before you remove the soldering iron or you’ll end up soldering it to the board!
I had forgotten to take a photo of this step so the following image was taken AFTER I had removed all the pins and the solder. Your PCB will still have the pins and the solder in it.
If the pins don’t come all the way out in the previous step (none of mine did!) then, with the Module Board vertical, apply heat to each pin (one at a time) on the solder side of the PCB and pull it out with a pair of needle nose pliers. Then move on to the next pin until all are removed.
Once the pins are removed, with the Module Board solder side up, heat each solder pad and suck the remaining solder out with your desoldering pump. Do not apply too much heat or too much pressure during this step. The pads on this PCB are easily damaged from overheating.
You should end up with holes that are mostly solder free. A tiny amount of solder remaining is not a problem. We are after enough room to easily press the IC socket in. Hold the PCB up to a light to check.
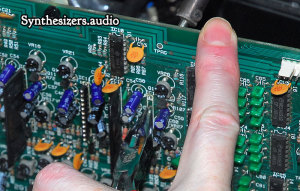
Once you have the holes clear, solder in the SIL IC socket. It is easiest to hold the PCB vertically, pre tin your soldering iron, place your finger on one end of the socket and apply the soldering iron to the pin at the OTHER end to your finger to apply a temporary solder joint to hold the socket in place. Let it cool and do the same for the pin at the opposite end.
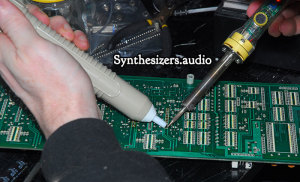
Then, with the PCB laying solder side up, solder the pins working from the middle to the outside, finally resoldering the outermost pins that had the temporary holding joints.
Check your soldering for shorts and check again!
Fit the repaired chip/s to the Module Board making sure you have it aligned properly in the socket with all pins in their correct holes and none bent out of their holes. It IS possible to insert the chip with it misaligned (i.e., one or more pins NOT in a hole and the whole chip offset). It is also possible to insert it the wrong way around.
Doing either of these things will probably damage the chip and/or the synth seriously!
The reason Roland removed pin 11 was so that the chip will only fit in the board one way. We have REMOVED that safety check so if you value your synth, DOUBLE CHECK YOUR WORK and then CHECK AGAIN!!
Update – I just had an idea while writing this article. Before fitting the chips into the sockets, you could solder up the socket at pin 11 on the Module Board (not pin 11 on the 80017A chip itself). That way, you’ll retain the safety feature of not being able to insert the 80017A chip with a dangerous pin offset. Make sure you solder up pin 11 though. If you solder the wrong one, it will be difficult to undo your error!
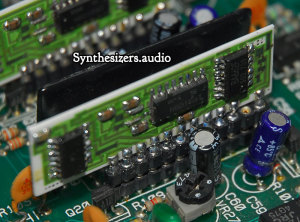
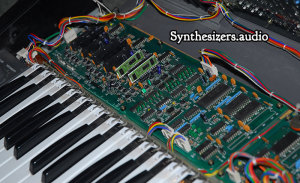
Once you are certain you have everything right, check again, then plug the Module Board back into your synth BEFORE you put the PCB screws back in (once again, I forgot to take a photo of that step so the photo below shows the PCB with the screws in it) and power it up in test mode (hold Key Transpose while turning the synth on, then press Poly 1&2 together). Play a note a few times and make sure all the voices are sounding and you have no crackles/noise. If all is well, leave the synth on for a while to let it warm up. If it keeps going without issue, you have successfully repaired your first 80017A chips!
If you still hear crackles on certain voices, you may either have another faulty chip and you will need to repeat this whole procedure for that chip (good thing you didn’t put the Module Board screws in yet isn’t it!), or you have an 80017A that is beyond repair and you’ll probably need to replace it with an analoguerennaisance.com chip. This is one of the reasons we fitted sockets!!
If all is well, screw the Module Board back in place.
If you have an oscilloscope, a good digital multimeter and a frequency counter or tuner and you know how to use them, I would recommend going through the alignment procedure described in the JUNO-106 service manual. Although my synth still has five out of six of the original 80017A chips in it, it was WAY out of alignment. I did the alignment procedure on mine and it sounds much more consistent between voices. The VCF now tracks the keyboard properly too. Prior to the alignment, the VCF tracking was all over the place and patches that made use of filter resonance did not sound the way they should!
A word of caution if you decide to do the alignment procedure: Make sure you do not short anything on the PCBs when attaching probes to the test points. You can easily damage your synth if you short something! Use a good quality probe designed to grip the test points with a spring loaded clamp. Most decent oscilloscopes come with such probes.
I very carefully bent the test point pins out to different angles to allow more room for attaching the probe without shorting anything. Be careful though, if you bend the pins too far, they will EASILY snap off!
Connect the earth pin of your test instruments to the ‘audio ground’ rather than ‘digital ground’ point. This isn’t mentioned in the manual.
Make sure your synth is thoroughly warmed up before you do the alignment. Otherwise, it will be in alignment when cold but will drift out as it warms up.
If the alignment procedure instructions in the service manual confuse you, do not fiddle with anything! At best, you’ll make things worse. At worst, you could damage your synth!
Once you are done, fit the screws back into the side cheeks of your restored Juno 106 and enjoy!

Thanks for taking the time to post this and the detailed directions/photo’s etc. got a bunch of NOS parts to strip before using them to fix an ailing Juno, this is a tremendous help.
Glad this has been a help to you Elieman. Stop by and let us know how you went with the repairs.
Fantastic helpful description! Even if I can’t do the job myself, I now know what is needed with my Juno 106, and won’t get ripped off at a less serious repair workshop. I especially appreciate to know that later I probably need to fix all six PCMs. Thus no need to pay a boatload of money to fix only one! There is more to come…
Thanks heaps for the feedback Dimaz. Hopefully we can keep our Junos running for some time yet. They are great synths and apart from these faults, they are generally very robust and reliable.
It’s good to know that there are some few tech-heads left who can fix these ancient devices. A dead/malfunctioning oscillator certainly makes using the synth difficult (and the old analog sounds, particularly the strings, are still non-pariel.)
Thanks for the very detailed instructions!
You’re most welcome Raymond. Hope this has been useful for you.
I’m planning to add some more tech articles about some of my other synth projects shortly too.
Hi Dannii,
This is very useful information. I, too, have a malfunctioning JUNO 106.
It automatically generates sound without pressing keys at power on.
In diagnostic mode, when a key is pressed, the sixth voice seems to be the offender. Four of the 8 banks generate audible noise along with the notes or affect the note in some other way when the sixth voice is being used. Would you agree that this is a 80017A problem?
Thanks,
Ken
Hi Ken,
This certainly sounds like a faulty 80017a chip. These chips contain both VCF and VCA circuitry and if the VCA is at fault, it can indeed cause notes to sound at various volumes when keys are not pressed. Aside from voice chip faults, the Juno 106 is generally a very reliable synthesizer.
If you decide to take on the repair, I also HIGHLY recommend removing the power supply PCB and resoldering the components (especially the regulator transistors) . Dry joints on this PCB can cause major failures if certain terminals of the regulator components go open circuit. This can cause the power supply to output higher unregulated voltage to the rest of the synth. I ALWAYS resolder power components on ANY synth or other device when I have it open for other servicing. This is cheap insurance against dangerous faults down the track.
Let us know how you go with the chip repair.
Cheers,
Dannii.
Thanks for this article Itrust youre theory more than the resin turning capacitance on shorting out more gonna try youre way on all my voice chips and see what happens
Let us know how you go Frankie. Take your time with the soldering and double check your work. Surface mount stuff is very easy to bridge accidentally and not see it without a close inspection.
I’m working on another two with these chips right now (another Juno 106 and an MKS30).
Great article, very interesting reading. Wish I had read it before acetoning voice 4 on my Juno, but even so I took pretty much the same precautions removing the coating, and it came back to life so I’m happy.
Also fixed the patch memory on my Juno 106 – traced the fault to the 40H373 chip holding the address lines to the SRAM high. Replaced with a 74LS373 and can now save/load patches correctly.
With each thing I fix, I find something new that is faulty – The filter seems to go fully open on Voice 1 & 2 on my Juno (no matter which patch you select). Would this be related to the “wave generator” chip between voice 1 & 2 chips? Or am I goin gto have to acetone voice 1 & 2?
Cheers – James
Apologies for the delayed reply James. Great to hear of your successful repairs.
Regarding the filter problem on voices 1 & 2, that sounds like it will almost certainly be the 80017a chips. Once one starts to fail, the others tend to follow fairly quickly in my experience. It would probably be worth your while taking the time to do them all in one go.
Hi,
freat article. I wonder which precautions you take while taking measurements inside the powered Juno on the PSU rails and during the calibration process? Do you have the Juno 106 attached to an isolation transformer and / or are you using diffenrential probes on your oscilloscope? What about the 1 KHz, 10 Vpp sine wave needed for calibration the chorus bias? Do you have an extra waveform generator for that? How do you deal with earth to not short circuit things?
Keep on your good work and thanks in advance for any suggestions on working save.
Best regards,
Dan